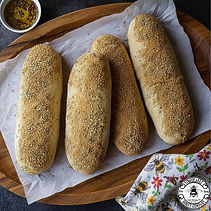
Italian Herb & Cheese Bread
📌Servings:
⏳Prep Time:
⏰Cook Time:
🍽️Type:
4 LOAVES
35 MINUTES
25 MINUTES
BREAD
👌🏻Perfect For:
serving alongside a hearty soup or fresh salad, enjoying on its own as a savory snack, creating an unforgettable bread with a herb swirl, dipping
📝Description:
This Italian Cheese & Herb Bread is made completely from scratch and naturally sweetened with honey instead of sugar. Our Italian Bread Dip Mix brings classic Italian herbs and spices, Parmigiano Reggiano and Pecorino Romano add rich, savory character swirl through the loaf. The honey enhances the herbs and helps create a beautifully golden crust. Use mild honey for a classic loaf, or try sting honey for a subtle sweet-heat finish that makes this bread truly unforgettable.
Share

🍯Ingredients
For Dough:
1⅓ cups (315mls) warm water
2¼ teaspoons (7 grams) active dry yeast
2 teaspoons Fingerlakes Honey Company honey (or Sting Honey for a kick)
3¼ cups (400 grams) bread flour
3 tablespoons extra virgin olive oil
2 teaspoons salt
For Herb & Cheese Mixture:
½ cup (55 grams) Parmigiano reggiano cheese, grated
½ cup (55 grams) Pecorino romano cheese, grated
4 tablespoons extra virgin olive oil (extra)
🥣Directions
Prepare the dough:
In the bowl of a stand mixer, stir together warm water, active dry yeast, and honey. Allow to stand for approximately 10 minutes until frothy.
Using the dough hook on the stand mixer (or using your hands), add flour to the water/yeast mixture and combine until the mixture comes together. Stand for 10 minutes.
Add oil and salt and continue to mix for 5 minutes (or 7 minutes by hand) until smooth and elastic.
Scrape the dough onto a lightly oiled surface and gather the edges into the middle to form a ball. Pinch the edges together to seal.
Lightly oil a large bowl. (we usually use the stand mixer bowl and don't bother washing it out...just rub it with oil.) Transfer the dough to the bowl, seam side down. Cover with plastic wrap, and let it rise in a warm area for about 1 hour or until doubled in size.
The dough is ready when a gentle finger press leaves a slight indentation that doesn't immediately spring back. If it does rebound quickly, allow a few more minutes and check again.
Stretch and fold the dough:
Scrape the dough out onto an oiled surface. Flatten slightly.
With oiled hands, reach for the furthest edge of the dough.
Gently lift and stretch the dough towards you until you feel resistance.
Fold the stretched dough over to the center of the dough rectangle.
Repeat the "lifting, stretching and folding into the center" step on the left-hand edge followed by the right and then the edge closest to you. Repeat the whole process one more time on all edges.
Then flatten into a rectangle again then roll the shorter side of the dough tightly into a log shape pinching the seam to close.
Cover the log with a clean kitchen towel and let it rest for 20 minutes.
Shape the loaves:
After the resting period, divide the dough into 4 equal pieces.
Take one piece of dough and flatten it into a rough 6 by 8-inch rectangle, but this time with the long side facing you.
Mix cheeses, herbs, and extra olive oil together.
Spoon roughly 3 tablespoons of the combined cheese, herb, and olive oil mixture on loaf.
Roll tightly into a log, pinching the seam to close. Turn the log over so the seam is underneath.
Repeat the shaping process and filling with each piece of dough in the same way.
Carefully transfer the loaves to the prepared baking sheet covered with parchment, leaving a few inches between them to allow for rising.
Sprinkle with the remaining cheese, herb, and oil mixture. Allow to rise for 30 minutes until almost doubled and nicely puffy. This will depend on the temperature of your kitchen. It may take longer if the temperature is cool.
In the meantime, preheat the oven to 400°F (200ºC).
Bake the bread:
Bake for 20 to 25 minutes until golden and cooked through (the center should reach reach 200°F.
Tips for Success:
Use warm water, not hot, when activating the yeast—aim for body temperature.
Oil your hands and any surfaces the dough will touch. This helps you manage the dough even if it’s a bit sticky.
Don’t worry if the dough feels sticky at first. Folding it will strengthen the bread and reduce stickiness.
Let the dough rise in a warm spot. If your house is too cold, the rise will be slower, but that’s okay—it will actually add more flavor to the bread.
*Nutritional information is provided as a courtesy and the nutrition facts are an estimate based upon servings. Exact information will depend upon the brands of ingredients and precise measurements used.

Subscribe To Get Our Latest Recipes
🛍️Recipe Products:
😍You Might Also Like:

Honey Cheddar & Chive Biscuits
These cheddar chive biscuits add a savory touch to any meal. Serve with our Irish Honey Potato Soup to wow your family!

Italian Bread Dip with Crostini
A delightful, flavorful start to your romantic meal, this Italian Bread Dip is infused with aromatic Fingerlakes Honey Company Italian Bread Dip Mix and served with crispy crostini for dipping. A perfect balance of herbs and spices that will awaken your taste buds.

REVIEWS
Italian Herb & Cheese Bread
No Reviews Yet.
We'd love to hear your thoughts if you make it.